The 30-second version
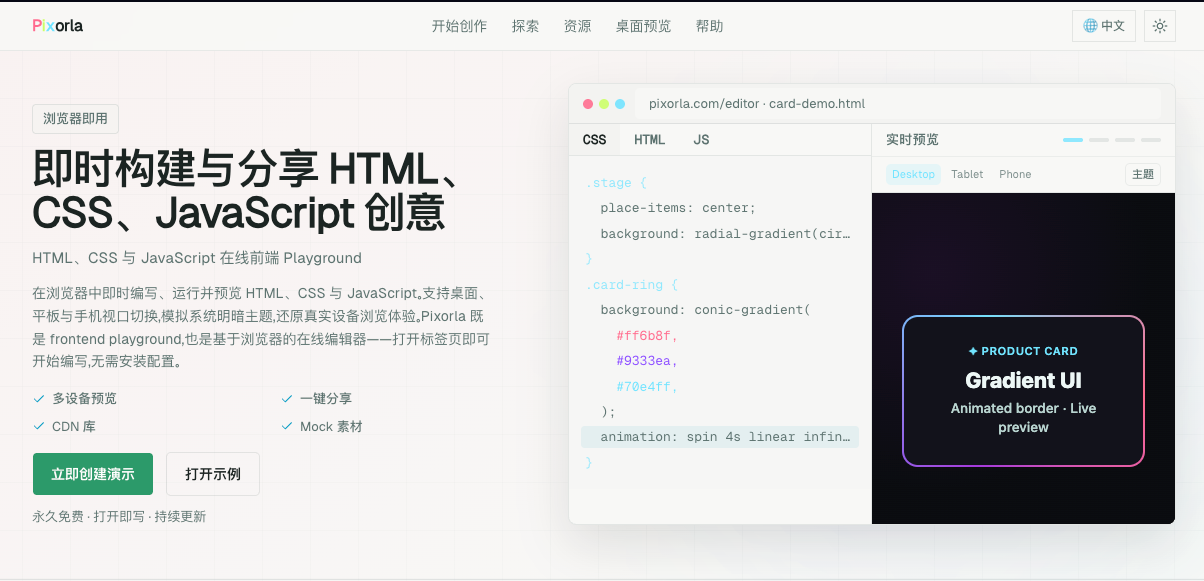
Pixorla is a front-end playground: open pixorla.com/editor, write HTML, CSS and JavaScript on the left, and see the result running on the right. Nothing to install, no project to scaffold, no account required to start typing — you sign in only when you want to save to the cloud.
It's for engineers who want to test an idea without spinning up a project, learners following along with a tutorial, teachers who need a demo students can open and poke at, and every "I just want to try this one bit of CSS" moment.
Why we built Pixorla
To try a small idea — a hover effect, a canvas animation — you usually pick one of two roads: a local project, or an online tool.
Local projects are heavy. Installing dependencies, wiring a bundler and starting a dev server for one gradient button takes longer than the idea deserves. Online tools are light enough, but they tend to compromise elsewhere: the editor feels like a dressed-up textarea, and the preview is always a desktop viewport of fixed width — what your page looks like on a phone is left to your imagination.
Pixorla's bet is that you can have both: zero setup to start, no compromises while you work.
Open and type: three panes and a live preview
The editor opens on a plain blank template. Three panes hold HTML, CSS and JavaScript, with no glue code in between; the preview refreshes automatically within a couple of seconds of your edits, and you can always re-run it manually.
Here's a small card, for example:
<div class="card">
  <h2>Hello, Pixorla</h2>
  <p>Your first page is already running.</p>
  <button id="btn" type="button">Click me</button>
</div>
body {
font-family: system-ui, sans-serif;
}
.card {
max-width: 320px;
margin: 80px auto;
padding: 24px;
text-align: center;
border-radius: 12px;
box-shadow: 0 10px 40px rgba(0, 0, 0, 0.12);
}
#btn {
border: 0;
border-radius: 999px;
padding: 10px 24px;
background: #4f46e5;
color: #fff;
cursor: pointer;
}// JS pane: one click, one count
let count = 0;
const btn = document.querySelector("#btn");
btn.addEventListener("click", () => {
count += 1;
btn.textContent = "Clicked " + count + " times";
});Paste those three snippets into the three panes and the preview shows a clickable card right away. At no point did you meet npm, webpack, or a single config file.
[Image: the editor with three panes and the live preview]
A preview that doesn't cheat: real device sizes, frames and zoom
The preview area ships with more than 140 device sizes, from mainstream phones and tablets to MacBook and iMac desktop viewports. Pick a phone and the preview puts on a device frame — camera cutouts, notches and side buttons are all there — so what you see while writing mobile pages is close to the real device, not a shrunk desktop window.
Zoom runs from 25% to 200%, which keeps long pages and big canvases in view; safe areas (notch, home-indicator) can be overlaid with real device parameters, so you don't need an actual phone on your desk while adapting a layout.
Start from a template, not from a blank file
If an empty file stares back at you, the editor also comes with 25 official templates: React, Vue, Preact, Tailwind CSS, Swiper, GSAP, Motion, three.js, p5.js, D3, Plotly, Lottie and more, with CDN links already wired up — pick one and it runs in the preview.
When learning a new library, the most expensive part is often the first minute: getting it to run at all. Templates remove that minute.
[Image: the template picker]
The editor behaves like an editor: completions, console and "Ask AI"
All three panes run Monaco, the same core that powers VS Code: shortcuts, multi-cursor and the command palette are all there. On top of that we added things playgrounds usually don't give you:
completions for CSS property names and values, including newer ones like backdrop-filter;
class-name completions for icon libraries like Font Awesome and Remix Icon while you write HTML;
hover docs and signature hints in Chinese for jQuery APIs (handy if you read Chinese);
a built-in console for the preview, so console.log output and errors show up in the page — no DevTools required.
Next to console errors there's an "Ask AI to diagnose this error" button. The model it calls is one you configure yourself — your own API key, or a local Ollama. Credentials stay in your browser and never touch Pixorla's servers.
Save and share: short links, forks and Explore
You can write without an account: your work is kept as a local draft in the browser, restorable within two hours. Sign in — GitHub works — and it saves to the cloud with a short /f/… link you can hand to anyone.
Each fiddle can be public or unlisted. Public ones can be forked by anyone with one click — remixing other people's work is one of the fastest ways to learn front-end. Or browse Explore to see what others have made and fork whatever looks interesting.
On the desktop: Pixorla Browser
If you prefer the feel of a native app, Pixorla Browser wraps the same playground for macOS, Windows and Linux, available from the download page.
Where free ends and Pro begins
Writing, saving, sharing, forking, favoriting — even uploading images through your own Cloudinary or Chevereto account (BYOK) — are all in the free tier. Pro adds privacy and organization: private fiddles, private notes, collections and an ad-free sidebar.
In other words: the full create-and-share loop costs nothing.
That's the tour. The next step is to do it yourself: open the editor, paste the little card above, change a color, rewrite a line — five minutes later you'll have your first fiddle. If you get stuck, the help center has answers.